
Business
Cabinet Styles To Tell Your Kitchen Cabinet Retailer

Your Pinterest board must have many options for a bright, airy kitchen. But did you know to pull it off, you would need to make difficult decisions? Choosing the right cabinets is one of them and comes with the biggest reward. Below is why.
The cabinet door style you choose is the largest decision you will make for the general style of your kitchen. Unfortunately, choosing a kitchen cabinet style can become overwhelming fast when you can’t distinguish between a shaker and a slab. To save you stress, we narrowed down what you need to know about kitchen cabinet styles so you can find the perfect fit for your home:
Frameless Vs. Framed Cabinets
There are two options on how to construct your cabinet: frameless and framed. Framed cabinets have an extra face frame at the front of the cabinet box where the hinges and doors are attached. With framed cabinets, you have the choice of full overlay, partial overlay, or inset door. With the overlay style, the door rests on top of the cabinet frame. Meanwhile, with inset cabinets, the doors are set into the cabinet frame so they sit flush with it when closed. You get a classic look with inset cabinets but it can be more costly and provides less storage since they need more work from your kitchen cabinet retailer so you achieve a perfect door/frame fit.
Frameless cabinets, which started in Europe but gained popularity in America, have full overlay doors that attach directly to the cabinet box through hinges on the interior of the cabinet. Frameless cabinets look contemporary and have more space inside.
Inside these two construction categories, you can choose several common door styles.
Shaker Style Cabinets
Shaker is the most popular cabinet door style because of its clean, classic lines since it works beautifully with any aesthetic, whether it is modern, transitional, or traditional. Also known as a ‘five-piece’, a Shaker door is basically a flat panel with a frame that has rails (horizontal pieces) and stiles (vertical pieces).
Its simplicity means it can complement various kitchen designs depending on how you customize the cabinet and the other kitchen design elements you pair it with. You can turn Shaker-style cabinets into a little more modern or more traditional by adding different types of edge detailing inside the frame.
The width of the frame can also change the cabinet completely. The thicker and more ornate the frame, the more traditional.
While shaker-style cabinets are loved for their versatility and timeless appeal, they can be annoying to keep clean since dust and grime collect on the inside of the frame. But, if you can handle the upkeep, this kitchen cabinet look will enhance almost any style and look chic as well.
Slab Cabinet Doors
When you think of a sleek, modern aesthetic, you are picturing slab cabinet doors. As called flat panel cabinets, this style has a single, smooth piece of wood, plywood, or MDF. Flat panels are available in various finishes and veneers from glossy white, grey, or colored lacquer to natural wood tones. The unadorned cabinet front creates a clean background for statement hardware or no visible hardware to look sophisticated.
Flat panel cabinets are usually associated with a stark, minimalist vibe but that’s not their only look. You can warm the cabinets with different colors and wood finishes. For example, a wood like black walnut has both light and dark characteristics that will add warmth and interest. And even though they look high-end, flat panel cabinets won’t have to break your budget. A modern flat-front cabinet door is very cost-effective. Wood is expensive but there are perfect laminates at the fraction of the cost that looks just as good on flat panel cabinets as the real things.
Bonus point: Since there are no crevices and detail to attract dust, grime, or cooking grease, flat panel cabinets are easier to clean compared to other cabinet styles.
Traditional Cabinet Doors
Best known for their timeless and warm appeal, traditional style cabinet creates an elegant as well as homey look. If you love a formal aesthetic and want to incorporate furniture-inspired details like decorative legs and corbels into your space, traditional cabinets are a great choice.
Usually, traditional kitchen cabinets have raised rather than flat center panels and typically stick to a warmer color palette, often wood tones. You can also opt for glazes and antique finishes. Unlike the more squared and simple Shaker-style cabinets, traditional cabinets usually have arches, curved details, or other embellishments. If you want a light and airy feel, traditional cabinets may not be the way to go.
Beadboard Cabinets
If the feeling you want to evoke in your new kitchen is of a charming cabin or a modern farmhouse kitchen, then go for beadboard kitchen cabinets. Styled after traditional beadboard that was on walls, these cabinets will fit in a home that is modern or traditional.
Another great point is that they are not that expensive since the overlaid cabinet doors are made with groove panels in the front. You can complement this look with an aged brass cup pull for the full cottage effect. You can either stain or paint beadboard cabinets. White beadboard cabinets are common but far from the only option.
We would recommend that you paint beadboard cabinets in a color other than white. Go for emerald green or navy, as white beadboard can be a bit tricky to keep clean because of the little grooves in it.
Conclusion
Now you know various cabinet styles you can tell your kitchen cabinet retailer to ensure your kitchen looks exactly how you want it. If you’re thinking about freshening up your kitchen, the cabinets are a great, and inexpensive way to transform your room. Artline Kitchen and Bath are here to fulfill your look for a dream kitchen so head to our site or store in Buffalo Grove, Illinois.


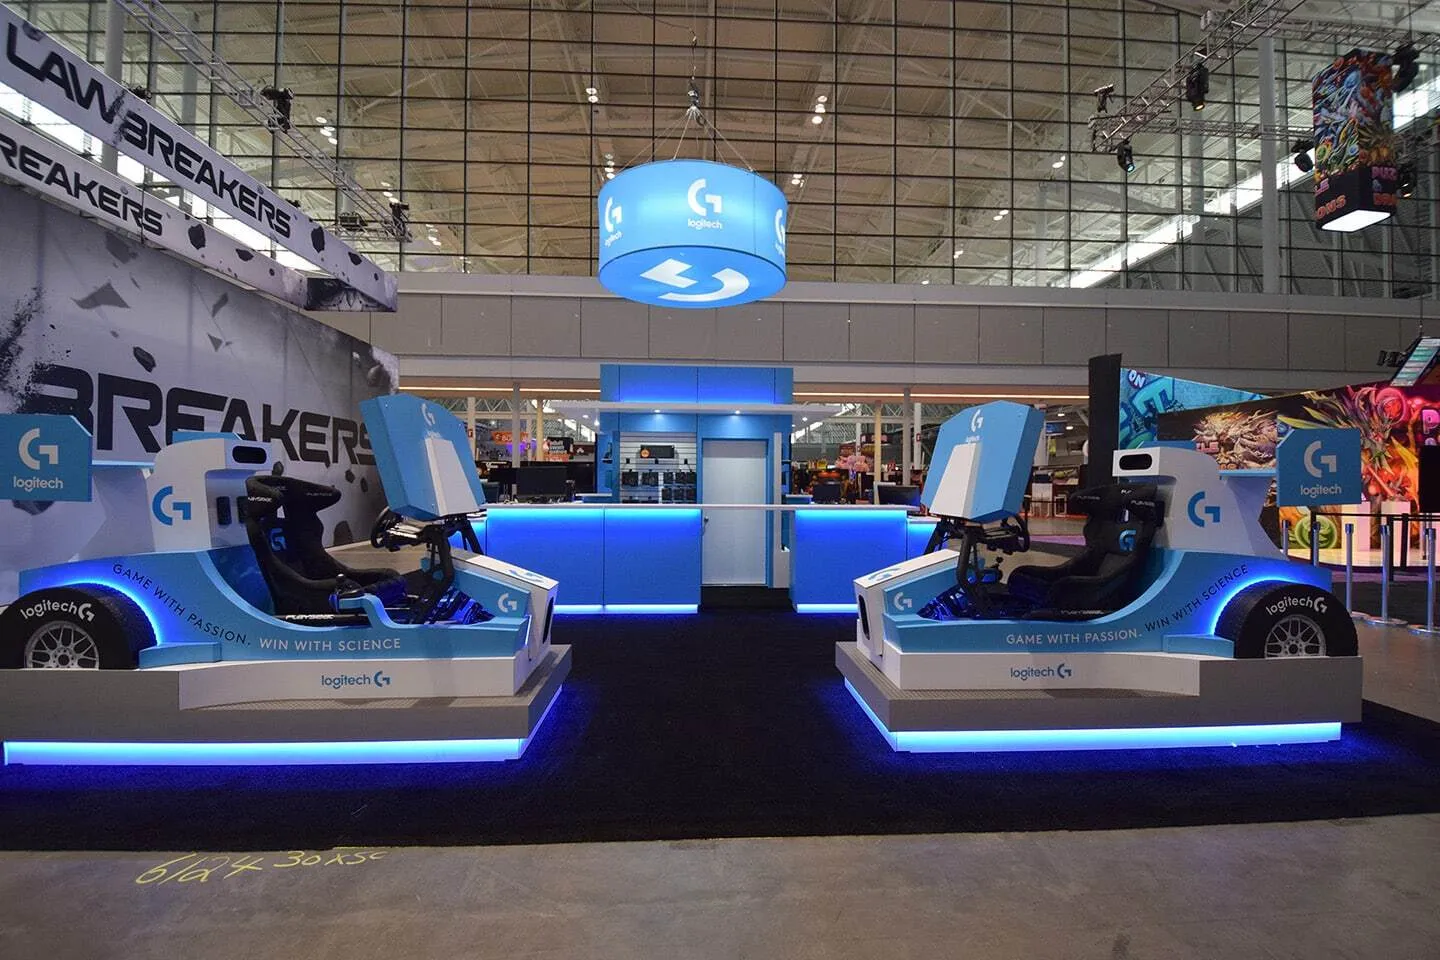
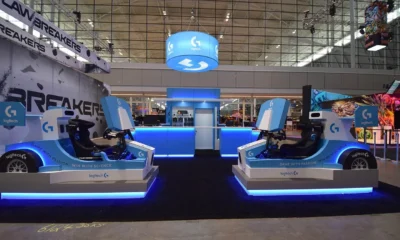
In the competitive environment of trade shows, grabbing attention and keeping it is essential. With dozens or even hundreds of booths competing for attendees’ time, subtle design cues often aren’t enough. That’s where lighting and audiovisual (AV) elements come into play. When used strategically, they can transform a standard booth into an immersive brand experience that engages visitors, communicates your message, and drives leads.
Here’s how lighting and AV can elevate your trade-show presence and why they are essential components of a modern exhibit strategy.
The Role of Lighting in Trade-Show Success
- Draw Attention from Across the Aisle
Trade shows are busy and visually crowded. Proper lighting ensures your booth stands out. Backlit graphics, spotlights on key products, and color accents can catch the eye from a distance, guiding attendees toward your space. - Enhance Brand Messaging
Lighting isn’t just functional — it’s emotional. Warm tones can make a space feel inviting, while bright, crisp lights highlight product details and modernity. Lighting can reinforce your brand personality and emphasize specific areas, such as a new product launch or promotional display. - Create Depth and Dimension
A flat, unlit booth can appear small and uninspiring. Layered lighting — combining backlights, overhead lights, and accent lighting — adds depth, making your space feel larger and more dynamic. This dimensionality also improves photography and videography opportunities, which are essential for post-show marketing.
The Power of Audiovisual Elements
- Tell Your Story Through Video
Videos are a powerful storytelling tool. They can demonstrate product features, showcase testimonials, or visually convey your brand’s mission in ways static graphics cannot. A well-placed screen loops compelling content, attracting visitors who may not stop otherwise. - Interactive AV Engages Visitors
Touchscreens, interactive demos, and augmented reality (AR) tools allow attendees to explore your products or services hands-on. Interactive AV experiences create memorable connections, prolong booth engagement, and improve lead quality. - Enhance Presentations and Live Demos
AV can support live presentations or workshops in your booth. Sound systems, microphones, and displays ensure that even a small booth can deliver a professional, engaging presentation. High-quality audio and visuals make your message accessible to everyone, even in noisy trade-show environments.
Integrating Lighting and AV Seamlessly
To maximize impact, lighting and AV should not be afterthoughts. They need to integrate seamlessly with your booth design and flow. Here’s how:
- Plan Early: Incorporate lighting and AV requirements during the design phase. This ensures fixtures, wiring, and power sources are accounted for without compromising aesthetics.
- Highlight Key Areas: Use lighting and screens to focus attention on your primary products, messages, or interactive zones.
- Maintain Clean Lines: Avoid clutter from cords or equipment. Properly concealed wiring and modular AV setups keep your booth looking polished.
- Balance Brightness and Color: Ensure lighting complements your graphics and screens. Too much brightness can wash out displays, while poor color balance can distort visuals.
Benefits of Investing in Lighting and AV
- Increased Booth Traffic: A visually striking booth attracts attendees who might otherwise walk by.
- Higher Engagement: Interactive screens and dynamic visuals keep visitors at your booth longer, increasing opportunities for conversation.
- Professional Image: High-quality lighting and AV convey a sense of professionalism and credibility.
- Memorable Experience: Visitors are more likely to remember a booth that combines sight, sound, and interactive elements.
Cost-Effective Strategies
Even if your budget is limited, there are ways to integrate lighting and AV effectively:
- LED Spotlights and Backlit Panels: Energy-efficient and reusable for multiple shows.
- Tablets or Small Screens: Offer interactive demos without investing in large-scale displays.
- Pre-Programmed Video Loops: Affordable and low-maintenance, allowing content to play continuously.
- Modular AV Equipment: Designed for portability and quick setup, reducing labor costs.
These options allow even smaller booths to feel dynamic, professional, and modern without breaking the budget.
Partnering with the Right Exhibit Company
Lighting and AV require expertise to design, install, and maintain properly. A professional exhibit partner can help you choose the right equipment, integrate it seamlessly into your booth, and ensure everything functions correctly during the show.
ExpoMarketing specializes in combining innovative lighting and AV solutions with high-quality booth design. Their team can create an immersive experience that highlights your products, reinforces your brand, and attracts the right audience. With their guidance, exhibitors can maximize engagement, leave a lasting impression, and boost ROI from trade shows.
Final Thoughts
In today’s trade-show environment, a basic booth isn’t enough to stand out. Strategic use of lighting and audiovisual elements can transform your space into an immersive, memorable experience.
From drawing attention across the aisle to creating interactive experiences and enhancing product demonstrations, lighting and AV elevate your booth’s effectiveness. By investing thoughtfully and partnering with experts, your trade-show presence can leave a lasting impression that drives engagement, builds connections, and delivers measurable results.

Outscaled is challenging the very foundation of traditional sales teams with a framework that eliminates the need for discovery calls, demos, or high-pressure sales reps. The company’s flagship system, the Silent Method, is helping hundreds of businesses close high-ticket deals without ever jumping on a call.
The Silent Method was developed by Outscaled co-founders Jake and Nathan Arthur after scaling multiple remote-first companies to 7 and 8 figures. At its core is a single, persuasive digital asset – a conversion-focused sales page that guides potential clients through the offer, pricing, proof, and action steps, all without a sales conversation.
“Most founders don’t want to spend their days chasing leads or managing closers,” said Jake, co-founder of Outscaled. “We designed the Silent Method to take the friction out of selling. It works 24/7, even with cold traffic, and lets our clients scale without burnout.”
This automation-friendly sales approach is particularly powerful for coaches, consultants, and agencies who want to sell premium offers without the complexity of traditional funnels or sales calls. Instead of building teams of closers, Outscaled clients are leveraging their Sales Sheets to pre-sell, qualify, and convert prospects using a proven structure and streamlined follow-up.
“The biggest myth in sales is that persuasion happens on a call,” added Nathan Arthur. “In reality, it happens before the call, or better yet, without one at all. The Silent Method gives founders back their time and their control.”
With results pouring in from industries ranging from business consulting to design services and personal development, Outscaled’s framework is quickly becoming the new standard for high-ticket digital sales.
For more information, visit outscaled.io or contact:
Contact:
Outscaled Team
team@outscaled.io
+1 954-908-6234
Outscaled Facebook
Outscaled Instagram

Earning money online has become a global trend, but many people are unsure where to start. Traditional freelancing often demands specialized skills, a strong portfolio, and significant time investment. On the other hand, survey sites and “get-rich-quick” platforms frequently disappoint with low payouts or questionable legitimacy.
This is where rapid workers steps in. Rapidworkers is a micro-task site designed to connect businesses that need small online jobs completed with individuals willing to perform them for pay. If you’ve ever wondered how RapidWorkers makes money, this article will walk you through the challenges it solves, strategies to maximize your earnings, the benefits of the platform, and tools that can help you succeed.
The Problem: Why Making Money Online Feels Overwhelming
For most people, earning money online presents several challenges:
- High skill barriers: Many freelance platforms favor those with technical expertise in design, coding, or copywriting.
- Long turnaround times: Larger projects often require days or weeks to complete before payment.
- Unclear payment terms: Some sites delay or fail to pay workers.
- Limited global access: Certain platforms restrict opportunities to specific regions.
For example, a study by Statista shows that while digital gig work is growing rapidly worldwide, many entry-level workers feel excluded due to a lack of experience. This creates demand for a platform that provides fast, simple, and legitimate micro-income opportunities, exactly what Rapidworkers offers.
Getting Started With Rapidworkers
Starting with Rapidworkers is simple and quick. You only need a few steps to begin earning money by completing small tasks online. These tasks are easy and do not require special skills. The site connects workers with employers who need small jobs done.
This section shows how to create your account and set up your profile. Both steps are important to get started and to receive tasks that match your skills.
Creating An Account
Go to the Rapidworkers website and find the sign-up button. Fill in your email, username, and password. Use a valid email because you will need to confirm it. After registering, check your email for a confirmation message. Click the link in that email to activate your account. Once activated, you can log in and start working.
Setting Up Your Profile
After creating your account, set up your profile. Add your full name and country. This helps employers know who they are hiring. Upload a clear profile picture if possible. Write a short description about yourself. Mention any skills or experience you have. A complete profile increases your chances of getting tasks. Keep your profile honest and updated. This builds trust with employers and helps you earn more.
Types Of Tasks Available
The Rapidworkers site offers many types of tasks to earn money. Each task is simple and quick. This variety helps workers find tasks that suit their skills and time. Understanding the types of tasks can help you choose the best way to earn.
Micro Tasks Overview
Micro tasks are small jobs that take just a few minutes. They often need little training or special skills. These tasks include clicking, watching videos, or filling out surveys. Each completed task earns a small payment. Doing many micro tasks can add up to a good income.
Popular Task Categories
Some common task categories stand out on Rapidworkers. Data entry jobs ask you to input or check information. Social media tasks include liking posts or following accounts. Website testing tasks ask for feedback on websites or apps. Surveys gather opinions on products or services. These categories offer many chances to earn money quickly.
How To Choose Tasks
Choosing the right tasks on Rapidworkers can help you earn money faster. The site offers many tasks, but not all tasks pay the same or take the same time. Picking tasks carefully saves your time and increases your earnings.
Focus on tasks that match your skills and pay well. Avoid tasks that seem too hard or pay very little. Use the site tools to filter and select tasks smartly.
Filtering Tasks By Difficulty
Rapidworkers lets you filter tasks by difficulty. Easy tasks take less time but may pay less. Hard tasks might pay more but need more effort. Choose tasks that suit your skill level. This helps you finish tasks quickly and avoid mistakes.
Selecting High-paying Tasks
High-paying tasks offer better rewards for your time. Look for tasks with clear instructions and good ratings. Avoid tasks that seem suspicious or have low pay. Prioritize tasks that pay more for less work. This strategy helps you earn more in less time.
Completing Tasks Effectively
Completing tasks effectively on Rapidworkers is key to earning steady money. Each task demands attention to detail and meeting specific instructions. This helps avoid rejections and saves time.
Understanding the task well leads to faster approval and more earnings. Focus on accuracy and follow the rules closely. Small mistakes can cause delays or loss of payment.
Task Requirements And Guidelines
Every task on Rapidworkers comes with clear requirements. Read them carefully before starting. They explain what you must do and how to submit your work.
Some tasks need screenshots as proof. Others require filling out forms or clicking links. Follow all instructions exactly to get paid.
Ignore extra steps that are not listed. Stick to the task scope to avoid rejection. Check the deadline and finish on time.
Tips For Fast And Accurate Completion
Focus on one task at a time. This reduces errors and speeds up work. Use a checklist to track steps for each task.
Double-check your answers or uploads before submission. Correct mistakes early to prevent delays. Stay organized to handle multiple tasks smoothly.
Use a stable internet connection to avoid interruptions. Save your work regularly. This keeps progress safe and helps meet deadlines.
Payment Methods And Payouts
Understanding payment methods and payouts on Rapidworkers is essential for users who want to earn money effectively. This section explains how you can receive your earnings, the minimum amount needed to withdraw, and the time it takes to get paid. Clear knowledge about these aspects helps you plan your tasks better and avoid surprises.
Available Payment Options
Rapidworkers offers several ways to get paid. The most common option is PayPal, a secure and widely used platform. You can also choose payment via Payoneer, which is popular for international users. Some users prefer gift cards, which Rapidworkers occasionally provides. These choices give flexibility to users worldwide.
Minimum Withdrawal Limits
Before requesting a payout, you must reach a minimum balance. Rapidworkers sets this limit at $10. This amount is easy to achieve by completing small tasks. Keeping track of your earnings helps you know when you can withdraw money. Reaching the limit quickly encourages steady task completion.
Payment Processing Times
After you request a payout, Rapidworkers processes payments within 3 to 5 days. This time frame depends on the payment method you choose. PayPal payments usually arrive faster than other options. Being aware of processing times helps you manage your expectations.
Maximizing Earnings On Rapidworkers
Maximizing earnings on Rapidworkers requires a smart approach. Consistency and wise task choices can boost your income. Understanding the referral program adds another income source. Focus on strategies that fit your time and skills. Small efforts each day add up quickly.
Consistency And Task Selection
Regular activity on Rapidworkers helps maintain steady earnings. Check the site daily to find new tasks. Choose tasks you can complete fast and well. Simple tasks often pay less but take less time. Complex tasks may pay more but need more effort. Balance your time and task difficulty for the best results. Avoid tasks that seem unclear or risky. Staying active and selective leads to steady income growth.
Referral Program Benefits
Rapidworkers offers a referral program to increase your earnings. Invite friends to join and earn a percentage of their income. This creates a passive income stream alongside your tasks. Share your referral link in places where people trust you. Explain the benefits of joining Rapidworkers to your referrals. The more active your referrals are, the more you earn. Use the referral program as a long-term earning strategy.
Common Challenges And Solutions
Using Rapidworkers to earn money has some challenges. Knowing these helps avoid problems. Simple solutions keep your account safe and earnings steady.
Avoiding Task Rejections
Task rejections reduce your earnings and lower your rating. Read each task’s instructions carefully before starting. Follow every step exactly as asked.
Check your work for mistakes before submitting. Double-check links, answers, and any required proof. Submit clear screenshots if needed. This helps show you completed the task correctly.
Do not rush tasks. Taking time improves accuracy and lowers rejection chances. If unsure about a task, skip it. Choose tasks you understand well.
Dealing With Account Issues
Account problems can stop your earnings. Keep your login details safe and private. Use a strong password and change it regularly.
Verify your email and profile information fully. Incomplete profiles may cause delays or restrictions. Contact Rapidworkers support quickly if you face issues.
Stay polite and clear in your messages to support. Provide all requested details to speed up help. Avoid using multiple accounts to prevent bans.
User Experiences And Reviews
User experiences and reviews reveal how Rapidworkers helps people earn money. Many users share their personal stories and challenges. These insights show what to expect from the site. Reading real feedback helps new users decide if it suits them.
Success Stories
Some users report steady earnings from simple tasks. They praise the easy signup process and fast task completion. Many mention receiving payments on time without hassle. For some, Rapidworkers became a small but consistent income source. Success often depends on task availability and user effort.
Potential Drawbacks
Some users face low pay rates for certain tasks. A few mention waiting longer to reach the minimum payout. Task quality can vary, with some feeling repetitive or dull. Occasional account restrictions have affected a small number of users. Patience and careful task selection can reduce these issues.
Frequently Asked Questions
What Is Rapidworkers, And How Does It Pay?
Rapidworkers is a micro-task website that pays users for completing small online jobs. Payments are made via PayPal or other supported methods once tasks are verified and approved. Users earn money by performing simple tasks like surveys, app downloads, and data entry.
How Do I Start Earning Money On Rapidworkers?
To start earning, sign up for a free account on Rapidworkers. Browse available tasks and complete those that match your skills. Submit proof of task completion for approval. Earnings accumulate in your account and can be withdrawn after reaching the minimum payout threshold.
Are Rapidworkers Tasks Easy And Quick To Complete?
Yes, most Rapidworkers tasks are designed to be simple and fast. Tasks typically take a few minutes each, such as watching videos, signing up for websites, or sharing content. This allows users to earn money steadily by completing multiple tasks daily.
Is Rapidworkers A Legitimate Site For Earning Money?
Rapidworkers is generally considered legitimate as it has paid thousands of users worldwide. However, earnings may be modest, and task availability varies. Always be cautious and avoid tasks requiring sensitive personal information to protect your privacy and security.
Conclusion
Making money online doesn’t have to be complicated. With Rapidworkers, you can start earning by completing simple micro-tasks, even if you have no advanced skills or prior freelancing experience. The platform is reliable, easy to use, and designed for both businesses seeking quick online engagement and individuals looking for flexible income opportunities.

Lighting and AV: Elevating Your Trade-Show Booth Experience
In the competitive environment of trade shows, grabbing attention and keeping it is essential. With dozens or even hundreds of...


Ride in Style: Why Every Couple Deserves a Wedding Limo Toronto
Your wedding day is one of the most memorable days of your life and every moment deserves a touch of...


Revolutionize Garden Care with Aiper Store Australia Irrigation Controllers
The contemporary homeowner is gradually resorting to technology to ease the maintenance of the gardens. Aiper Store Australia has an...


Sales Reps No Longer Required: Outscaled’s Framework Closes Clients Without the Close
Outscaled is challenging the very foundation of traditional sales teams with a framework that eliminates the need for discovery calls,...


Mastering Mindfulness: Techniques for Inner Peace
Mindfulness is a mental practice that emphasizes being present in the moment, fully engaging with one’s thoughts, feelings, and surroundings...


The True Cost of Lawn Care: Budgeting for a Beautiful Yard
When embarking on a lawn care project, the initial costs can often be a significant factor in determining the overall...


Starting Strong: Choosing the Right Pickleball Paddle for New Players
Pickleball has become one of the fastest-growing sports in the country, attracting people of all ages with its mix of...
-
 Technology3 years ago
Is Camegle Legit Or A Scam?
-
 Travel3 years ago
NEW ZEALAND VISA FOR ISRAELI AND NORWEGIAN CITIZENS
-
 Technology3 years ago
RNDcoin: Korea’s first blockchain project and a world-class cryptocurrency
-
 Uncategorized3 years ago
AMERICAN VISA FOR NORWEGIAN AND JAPANESE CITIZENS
-
Lifestyle1 year ago
A Guide to Silverdaddies: What You Need to Know
-

 Fashion1 year ago
Goda Perfume Reviews: Is It Worth Your Investment?
-
 Health3 years ago
Health Benefits Of Watermelon
-

 Home Improvement9 months ago
Artificial Grass Designs: Perfect Solutions for Urban Backyards