
Technology
Unlock the Web Securely with iTop VPN The Best Free VPN for 2025
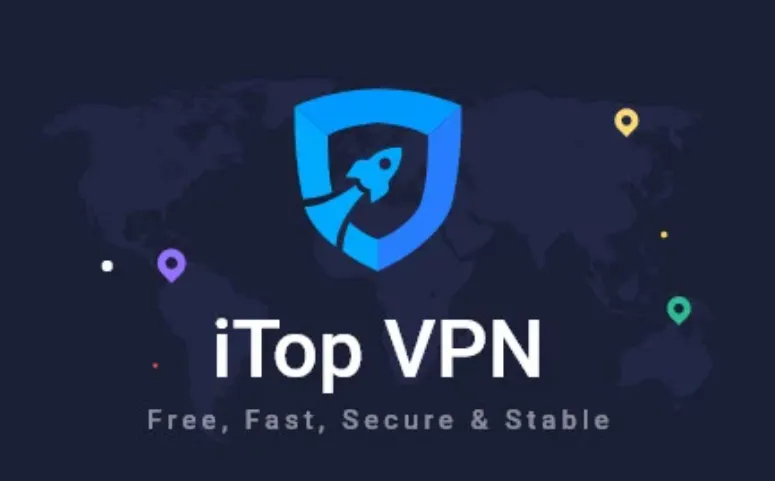
In today’s digital age, where online privacy is becoming increasingly important, using a free VPN is no longer just a luxury — it’s a necessity. Whether you’re trying to protect your data from hackers, access geo-blocked content, or browse anonymously, a reliable VPN is a must-have tool. Among the countless VPN options available, iTop VPN stands out as one of the most effective, user-friendly, and truly free VPNs available today.
What is an iTop VPN?
iTop VPN is a virtual private network service designed to offer users enhanced privacy, security, and access to restricted content. Whether you’re trying to stream your favorite Netflix shows from another region, use apps that are blocked in your country, or just want to surf the web anonymously, iTop VPN has you covered. What makes it especially appealing is its free VPN version, which provides basic protection and performance without costing a penny.
Unlike many VPN services that limit the free version with frustrating speed or usage caps, iTop VPN provides a generous bandwidth allowance and access to several high-speed servers — even in its free plan.
Key Features of iTop VPN
Here are some of the standout features that make iTop VPN one of the most reliable choices for both beginners and advanced users:
1. Free Plan with No Strings Attached
iTop VPN offers a genuinely free VPN option that doesn’t require a credit card to get started. You can immediately download, install, and connect to the service without having to sign up for a subscription. This is perfect for users who want essential protection or just need occasional access to a VPN.
2. Military-Grade Encryption
Your privacy is iTop VPN’s top priority. It uses 256-bit AES encryption, the same level of security used by banks and government agencies. This ensures that your online activities are protected from hackers, ISPs, and surveillance.
3. Access to Geo-Restricted Content
Want to watch U.S. Netflix while traveling abroad? Need access to YouTube or social media platforms in restricted countries? iTop VPN makes it possible. With servers located in multiple countries, you can bypass geo-blocks and censorship easily.
4. No-Log Policy
iTop VPN has a strict no-logs policy. This means that your browsing history, connection timestamps, and data usage are not stored or monitored. With increasing concerns over digital surveillance, having a VPN that doesn’t log your data is a significant advantage.
5. Fast & Stable Servers
One common issue with free VPN services is slow connection speed. iTop VPN addresses this with a wide range of high-speed servers optimized for streaming, gaming, and regular browsing. This makes it one of the fastest free VPN services on the market.
6. Easy to Use Interface
Whether you’re a tech-savvy individual or a complete beginner, iTop VPN is incredibly easy to use. Its clean, intuitive interface allows you to connect to a server with just one click. You can also select specialized servers based on your needs, such as streaming or gaming.
Why Use a Free VPN Like iTop VPN?

Using a free VPN like iTop VPN offers several benefits:
- Privacy: Hide your IP address and encrypt your internet connection.
- Freedom: Access content from around the globe, bypassing geo-restrictions.
- Security: Stay protected on public Wi-Fi networks, preventing data theft.
- Affordability: Enjoy core VPN features without having to spend money.
When to Upgrade to the Premium Version
While the free version of iTop VPN is feature-rich, the premium version unlocks additional benefits:
- Unlimited bandwidth
- Access to more global servers
- Faster speeds and better streaming quality
- 24/7 customer support
- Advanced security features like kill switch, split tunneling, and more
For users who need a VPN regularly or for intensive tasks like streaming and torrenting, upgrading to the premium plan offers excellent value for money.
Final Thoughts
In a world where digital threats are increasing, using a free VPN like iTop VPN can help you stay one step ahead. Whether you want to secure your connection on public Wi-Fi, unblock your favorite streaming sites, or simply maintain your online anonymity, iTop VPN is a smart choice.
With its user-friendly design, robust security features, and reliable performance, it’s no wonder that iTop VPN is becoming one of the most popular free VPN options globally. Give it a try — your online freedom and privacy are worth it.

Speak to Someone at Norton USA Contact Numbers 1-888-768-2981 a Detailed Step by Step Guide
Navigating Norton plans +1-888-768-2981 can sometimes require a little extra assistance. Whether you’re adjusting a Norton subscription, clarifying billing details, or seeking a refund, speaking with a live person at Norton can often be the most efficient way to resolve your concerns. This guide outlines +1-888-768-2981 how to reach a live Norton agent via phone, chat, and other methods, offering tips to minimize wait times and ensure a smooth support experience.
Why Speak with a Live Norton Agent?
While automated systems can handle many basic inquiries, certain situations often necessitate human interaction. These include:
- Subscription issues: Changes or cancellations often require personalized assistance to manage or secure refunds.
- Complex account setups: Multi-device setups or special security configurations are best handled by a live agent.
- Refunds and billing issues: Navigating refund processes or billing disputes is often easier with direct communication.
- Technical issues: Software errors, installation problems, or account lockouts often need live troubleshooting.
- Clarity and peace of mind: Sometimes, simply speaking with a live person can provide reassurance and clear answers.
How to Contact Norton Customer Service:
Norton +1-888-768-2981 offers multiple avenues for connecting with their support team:
Phone Support: The Direct Line
Calling Norton +1-888-768-2981 customer service hotline is often the fastest way to reach a live agent. While you may encounter automated prompts, persistence and clear articulation of your needs can quickly connect you to a real person.
Live Chat: Convenient Online Assistance
Norton’s live chat feature is ideal for those who prefer text-based communication. Accessible via the “Support” or “Contact Us” section on the Norton website, it allows real-time help from an agent.
Mobile App Support: Help on the Go
Using the Norton mobile app, users can access chat or call support directly, offering a fast and portable way to solve issues.
Email Support: For Less Urgent Matters
You can email Norton for inquiries that aren’t time-sensitive. Expect a longer response time than live chat or phone.
Social Media: Public Inquiries (Use Carefully)
Norton is active on platforms like Twitter and Facebook. While you can message them, don’t share private info like account details. This method is better for general updates or announcements.
Tips for Connecting with a Live Agent via Phone:
- Be prepared: Have your Norton account email, product key, or subscription ID ready.
- Be clear: Briefly and clearly explain your issue.
- Be patient: Wait times may vary, especially during busy hours.
- Use prompts wisely: Follow the phone menu or say “representative” to bypass.
- Repeat if needed: Say “agent” or press “0” multiple times if necessary.
International Callers:
For users outside the U.S., the Norton number remains the same:
- Norton UK: +1-888-768-2981
- Norton en Español: +1-888-768-2981
- Norton Australia: +1-888-768-2981
Common Norton Customer Service Inquiries:
- Subscription changes/cancellations
- Software installation issues
- Billing or renewal disputes
- Account recovery/password resets
- Product upgrades and support for multiple devices
By using the above contact options and tips, you can quickly speak with a live Norton agent +1-888-768-2981 to address your issue efficiently.
The 1–800 +1-888-768-2981 Phone Number for Norton Support
You can call Norton customer service toll-free at +1-888-768-2981 for any issue related to subscriptions, renewals, refunds, or installations. For fast service, have your account info or Norton product key ready.
Use the Norton Help Centre +1-888-768-2981
Norton’s online Help Center is full of resources. It’s great for self-service troubleshooting or minor questions.
Steps to use the Help Center:
- Go to Norton’s Support page +1-888-768-2981
- Select a relevant topic (billing, security, downloads, etc.)
- Browse articles or click “Contact Us” to access chat or call support.
Live Chat with Norton
Want faster help than phone? Try Norton’s live chat.
- Visit Norton’s official site +1-888-768-2981
- Click “Support” then “Chat with Us”
- Explain your issue—an agent will respond in real-time
Reach Out via Social Media
Send a message to Norton’s verified social media profiles like Twitter or Facebook. While response time may vary, it’s a viable option for non-urgent issues or status updates.
Tip: Include your subscription ID and detailed issue (without sharing sensitive data publicly).
Use the Norton Contact Form +1-888-768-2981
Not in a rush? Fill out Norton’s official contact form via their “Contact Us” page. Include:
- Your Norton product and subscription details
- Clear explanation of your issue
- Screenshots (if applicable)
- Norton account email
A representative typically responds within 24–48 hours.
Conclusion
Getting in touch with Norton +1-888-768-2981 from the USA or abroad doesn’t have to be difficult. Whether you call, chat, or email, using the right method based on urgency saves time and gets results.
Summary – Contact Norton Customer Service:
- Call: +1-888-768-2981 (24/7 toll-free support)
- Live Chat: Via website or mobile app
- Email: Through their contact form for written support
- Social Media: For general queries and updates
- Help Center: For FAQs and guides
Whether it’s dealing with technical errors, billing issues, or managing your security settings, speaking with a Norton live representative +1-888-768-2981 can help resolve your concern quickly and clearly.

Introduction
The Transportation Research Board (TRB) continues to champion groundbreaking research through its prestigious committee awards, with the AKD10 Best Paper Award standing as a testament to innovation in transportation studies. This annual recognition celebrates researchers who push boundaries and contribute meaningful insights to the field.
Each year, the TRB AKD10 committee evaluates dozens of submissions, seeking work that demonstrates exceptional methodology, significant findings, and practical applications. The award represents more than academic achievement it highlights research that can shape transportation policy, improve infrastructure planning, and enhance mobility solutions for communities worldwide.
Understanding the significance of this award provides valuable insight into current transportation research trends and the evolving challenges facing our mobility systems.
Understanding the TRB AKD10 Committee
The Transportation Research Board’s AKD10 committee operates within TRB’s extensive network of standing committees, each focused on specific aspects of transportation research. These committees serve as the backbone of TRB’s mission to advance transportation knowledge through rigorous peer review and collaborative research initiatives.
AKD10 committees typically focus on specialized transportation topics, ranging from freight logistics and urban planning to emerging technologies and sustainable transportation solutions. Committee members include academics, industry professionals, and government researchers who bring diverse perspectives to the evaluation process.
The committee’s role extends beyond award selection. Members facilitate knowledge exchange, identify research gaps, and foster collaboration between institutions. This comprehensive approach ensures that recognized research addresses real-world transportation challenges while maintaining the highest academic standards.
The Significance of the Best Paper Award
The TRB AKD10 Best Paper Award carries substantial weight within the transportation research community. Recipients gain recognition from peers, increased visibility for their work, and opportunities for further collaboration and funding.
This award specifically targets papers that demonstrate innovative approaches to transportation challenges. Evaluation criteria typically include research originality, methodological rigor, practical applicability, and potential impact on transportation practice or policy.
Winning papers often introduce new analytical methods, present novel findings about transportation behavior, or propose innovative solutions to persistent mobility problems. The recognition helps bridge the gap between academic research and practical transportation planning, ensuring that valuable insights reach practitioners and policymakers.
Spotlight on the Winning Research
While specific details about the current year’s winning paper may vary, TRB AKD10 Best Paper Award recipients typically represent cutting-edge research addressing contemporary transportation challenges. These studies often employ advanced analytical techniques, utilize large-scale datasets, or explore emerging transportation technologies.
Previous winners have tackled diverse topics including traffic flow optimization, public transit accessibility, freight movement efficiency, and the integration of autonomous vehicles into existing transportation networks. The research methodologies range from complex mathematical modeling to comprehensive field studies and innovative data collection techniques.
The selected papers demonstrate how academic research can directly inform transportation decision-making. Authors typically combine theoretical frameworks with practical applications, ensuring their findings can guide real-world transportation improvements.
Impact and Implications of Award-Winning Research
Research recognized by the TRB AKD10 Best Paper Award often influences transportation planning practices, policy development, and future research directions. These studies provide evidence-based solutions to complex mobility challenges and introduce new perspectives on persistent transportation problems.
The implications extend beyond academic circles. Transportation agencies, consulting firms, and technology companies frequently reference award-winning research when developing new projects, implementing policy changes, or creating innovative transportation solutions.
Furthermore, recognized research often sparks additional studies, creating research clusters around important transportation topics. This multiplier effect amplifies the initial research impact and contributes to the broader advancement of transportation knowledge.
Insights from the Transportation Research Community
The TRB AKD10 Best Paper Award reflects broader trends in transportation research, highlighting emerging priorities and methodological innovations. Committee members and research evaluators often note the increasing sophistication of analytical techniques and the growing emphasis on interdisciplinary approaches.
Recent trends show increased focus on sustainability, equity, and technology integration in transportation research. Award-winning papers increasingly address environmental impacts, social justice considerations, and the role of emerging technologies in transportation systems.
The evaluation process also reveals the transportation community’s commitment to rigorous peer review and collaborative research development. Committee members provide detailed feedback that helps authors refine their work and contributes to overall research quality improvement.
Frequently Asked Questions
What makes a paper eligible for the TRB AKD10 Best Paper Award?
Papers must typically be presented at TRB Annual Meetings and fall within the AKD10 committee’s specific focus area. They should demonstrate original research, rigorous methodology, and significant contributions to transportation knowledge.
How are winning papers selected?
Committee members evaluate submissions based on established criteria including research quality, innovation, practical relevance, and potential impact. The selection process involves multiple rounds of peer review and committee discussion.
Can international researchers submit papers for consideration?
Yes, TRB welcomes submissions from researchers worldwide, provided the research meets committee standards and addresses relevant transportation topics.
What benefits do award winners receive?
Winners receive formal recognition at TRB Annual Meetings, increased visibility within the transportation research community, and potential opportunities for collaboration and follow-up research.
How can researchers improve their chances of award consideration?
Focus on addressing significant transportation challenges, employ rigorous methodology, demonstrate practical applications, and clearly communicate research contributions and implications.
Advancing Transportation Knowledge Through Recognition
The TRB AKD10 Best Paper Award represents more than individual achievement it symbolizes the transportation research community’s commitment to excellence and innovation. By recognizing outstanding research, the award encourages continued investigation into critical transportation challenges and promotes the application of research findings to real-world problems.
For researchers, the award provides motivation to pursue high-impact studies that can influence transportation practice. For practitioners, award-winning research offers evidence-based solutions and innovative approaches to persistent mobility challenges.
As transportation systems continue evolving with new technologies, changing demographics, and environmental concerns, awards like the TRB AKD10 Best Paper Award ensure that research keeps pace with these developments and continues providing valuable insights for creating more efficient, sustainable, and equitable transportation systems.

Introduction
Mosnode is rapidly becoming an essential tool for developers and businesses looking to streamline their node management processes. Whether you’re managing a single application or orchestrating complex distributed systems, understanding how to leverage mosnode effectively can significantly impact your project’s success.
This comprehensive guide will walk you through everything you need to know about mosnode, from its core functionality to advanced implementation strategies. By the end of this post, you’ll have the knowledge and confidence to integrate mosnode into your workflow and maximize its potential for your specific use case.
What Is Mosnode and Why Does It Matter?
Mosnode is a powerful node management platform designed to simplify the deployment, monitoring, and scaling of distributed applications. At its core, mosnode provides developers with a centralized interface for managing multiple nodes across different environments, whether they’re running locally, in the cloud, or in hybrid configurations.
The platform emerged from the growing need to handle increasingly complex distributed systems without overwhelming development teams with management overhead. Traditional node management often requires juggling multiple tools, monitoring systems, and deployment scripts. Mosnode consolidates these functions into a single, intuitive platform.
What sets mosnode apart is its focus on automation and intelligent resource allocation. Rather than requiring manual intervention for routine tasks, the platform learns from your usage patterns and automatically optimizes node performance, resource distribution, and scaling decisions.
Key Features That Make Mosnode Stand Out
Automated Node Discovery and Registration
One of mosnode’s most powerful features is its ability to automatically discover and register new nodes as they come online. This eliminates the tedious manual process of configuring each node individually and ensures that your system maintains an accurate, real-time inventory of available resources.
Intelligent Load Balancing
Mosnode uses advanced algorithms to distribute workloads across your nodes based on current capacity, historical performance data, and predicted usage patterns. This intelligent approach prevents bottlenecks and ensures optimal performance across your entire infrastructure.
Real-Time Monitoring and Analytics
The platform provides comprehensive monitoring capabilities that give you deep insights into node performance, resource utilization, and system health. These analytics help you make informed decisions about scaling, optimization, and troubleshooting.
Seamless Scaling Operations
Whether you need to scale up during peak traffic periods or scale down to optimize costs, mosnode handles these operations smoothly with minimal disruption to your running applications.
Cross-Platform Compatibility
Mosnode works across different operating systems, cloud providers, and deployment environments, making it an excellent choice for organizations with diverse infrastructure requirements.
Getting Started: Your First Steps with Mosnode
Setting Up Your Environment
Before diving into mosnode, ensure your system meets the basic requirements. You’ll need a supported operating system (Linux, macOS, or Windows), at least 4GB of RAM, and network connectivity for the nodes you plan to manage.
Start by downloading the mosnode installer from the official website. The installation process is straightforward and includes setup wizards for different operating systems. During installation, you’ll configure basic settings like network interfaces, security certificates, and initial user accounts.
Creating Your First Node Cluster
Once mosnode is installed, creating your first node cluster involves several key steps:
Initialize the Master Node: Begin by designating one machine as your master node. This node will coordinate activities across your cluster and serve as the primary management interface.
Add Worker Nodes: Connect additional machines to your cluster as worker nodes. Mosnode’s discovery feature will automatically detect compatible machines on your network, or you can manually specify node addresses.
Configure Node Roles: Assign specific roles to different nodes based on their capabilities and your application requirements. Some nodes might handle compute-intensive tasks, while others focus on data storage or networking.
Set Up Security Policies: Establish security rules that govern how nodes communicate with each other and with external systems. Mosnode provides templates for common security configurations.
Basic Configuration and Initial Testing
After setting up your cluster, run mosnode’s built-in diagnostic tools to verify that all nodes are communicating correctly. These tests check network connectivity, resource availability, and security configurations.
Configure basic monitoring and alerting to ensure you’ll be notified if any issues arise. Start with simple metrics like CPU usage, memory consumption, and network latency before moving to more complex application-specific monitoring.
Advanced Techniques for Maximum Efficiency
Custom Resource Allocation Strategies
While mosnode’s default resource allocation works well for most scenarios, you can create custom allocation strategies for specialized workloads. For example, you might prioritize certain applications during business hours or allocate extra resources to backup processes during off-peak times.
Integration with CI/CD Pipelines
Mosnode integrates seamlessly with popular continuous integration and deployment tools. You can configure automatic deployments that scale your node cluster based on deployment requirements and automatically roll back changes if issues are detected.
Advanced Monitoring and Alerting
Beyond basic system metrics, mosnode can monitor application-specific indicators and business metrics. Set up custom dashboards that display the information most relevant to your team, and configure intelligent alerting that reduces noise while ensuring critical issues get immediate attention.
Performance Optimization Techniques
Use mosnode’s performance profiling tools to identify bottlenecks and optimization opportunities. The platform can suggest configuration changes, recommend resource reallocation, and even predict when you might need to add additional nodes.
Real-World Applications and Success Stories
E-commerce Platform Scaling
A mid-sized e-commerce company used mosnode to handle traffic spikes during holiday sales periods. By implementing intelligent auto-scaling, they reduced server costs by 30% during normal operations while maintaining perfect uptime during peak traffic events.
Development Environment Management
A software development team leveraged mosnode to manage development and testing environments across multiple projects. The platform’s ability to quickly spin up isolated environments and tear them down when no longer needed reduced their infrastructure costs by 45%.
Data Processing Pipeline
A data analytics company implemented mosnode to manage their batch processing workflows. The platform’s intelligent job scheduling and resource allocation capabilities reduced processing times by 40% while improving resource utilization across their node cluster.
Troubleshooting Common Issues
Node Communication Problems
If nodes aren’t communicating properly, check network configurations and firewall settings. Mosnode provides diagnostic tools that can identify common connectivity issues and suggest solutions.
Performance Bottlenecks
When experiencing performance issues, use mosnode’s monitoring tools to identify which nodes or resources are under stress. The platform often provides automated recommendations for resolving these bottlenecks.
Scaling Issues
If automatic scaling isn’t working as expected, review your scaling policies and resource thresholds. Sometimes manual adjustment of these parameters is necessary to match your specific application behavior.
Frequently Asked Questions
Is mosnode suitable for small-scale deployments?
Yes, mosnode works well for deployments of any size. While it excels in large, complex environments, its automation features and simplified management interface make it valuable even for smaller projects.
What security measures does mosnode implement?
Mosnode includes enterprise-grade security features including encrypted communication between nodes, role-based access control, audit logging, and integration with popular security frameworks and identity providers.
Can mosnode work with existing infrastructure?
Mosnode is designed to integrate with existing systems. It supports hybrid deployments and can gradually replace existing node management tools without requiring a complete infrastructure overhaul.
How does pricing work for mosnode?
Mosnode offers flexible pricing tiers based on the number of nodes and features required. There’s typically a free tier for small deployments and development use, with paid tiers for production environments and advanced features.
What kind of support is available?
The mosnode community provides extensive documentation, tutorials, and forums for peer support. Commercial support options are available for enterprise customers who need guaranteed response times and dedicated assistance.
Taking Your Next Steps with Mosnode
Mosnode represents a significant advancement in node management technology, offering the automation and intelligence needed to handle complex distributed systems efficiently. The platform’s combination of powerful features and user-friendly interface makes it accessible to development teams of all sizes and experience levels.
Start by implementing mosnode in a development or testing environment to familiarize yourself with its capabilities. As you become more comfortable with the platform, gradually expand its use to production workloads and explore advanced features like custom resource allocation and CI/CD integration.
The key to success with mosnode lies in understanding your specific requirements and leveraging the platform’s flexibility to create solutions tailored to your needs. With proper implementation and optimization, mosnode can significantly improve your infrastructure efficiency, reduce operational overhead, and provide the scalability foundation your applications need to grow.


Gray poplar 3pl logistics partner: Your Complete Logistics Partnership Solution
Introduction Supply chain management has become increasingly complex as businesses expand globally and customer expectations for fast, reliable delivery continue...


Finding the Right Lakewood Mesothelioma Lawyer Vimeo: Your Legal Guide
Introduction A mesothelioma diagnosis brings overwhelming challenges medical treatments, financial concerns, and difficult family conversations. If you or a loved...


What Is Cruce de Horarios Fic and Why Is It Taking Over?
Introduction Fanfiction has evolved far beyond simple character reimaginings. Among the countless subgenres that have emerged, “cruce de horarios fic”...


Suwannee participation lineup for 2024 suwannee hulaween: Your Complete Guide to This Year’s Lineup
Introduction The moss-draped oaks of Spirit of the Suwannee Music Park are preparing to host one of the most anticipated...


Yale Navigation Center Ochca: Transforming Lives Through Partnership
Introduction When someone experiences homelessness or faces a mental health crisis, finding the right support can feel overwhelming. The Yale...


MyVarsity Yearbook: The Complete Guide for Schools
Introduction Creating a memorable yearbook that truly captures the essence of your school year has never been easier. MyVarsity Yearbook...


Finding Jennings Funeral Home Jenningsfh Obituaries: A Complete Guide
Introduction Losing a loved one brings overwhelming emotions and countless decisions that need immediate attention. During these difficult times, funeral...
-
 Travel3 years ago
NEW ZEALAND VISA FOR ISRAELI AND NORWEGIAN CITIZENS
-
 Technology3 years ago
Is Camegle Legit Or A Scam?
-
 Uncategorized3 years ago
AMERICAN VISA FOR NORWEGIAN AND JAPANESE CITIZENS
-
 Health3 years ago
Health Benefits Of Watermelon
-

 Home Improvement6 months ago
Artificial Grass Designs: Perfect Solutions for Urban Backyards
-
 Fashion2 years ago
Best Essentials Hoodies For Cold Weather
-
 Uncategorized3 years ago
How can I write a well-structured blog post?
-

 Fashion11 months ago
Goda Perfume Reviews: Is It Worth Your Investment?